Friday, September 26, 2014

Lollipop, Lollipop

Hi friends! We have had such beautiful weather her in Northeastern Ohio for the past few days. My granddaughter and I have been taking lots of walks, visiting the library and going to the park. Trying to enjoy the nice days before the cold weather arrives.

My project today is a lollipop holder that I found on Pinterest (of course). Isn't this lollipop holder the cutest? You can find the tutorial here.  It is a quick and easy project.


 (front)

(side)


Stampin' Up cardstock was used for the base. Then I used my 1 1/4" circle punch for the circle and my 
1 3/8" scalloped punch for the frame. White woven ribbon was tied in a bow around the lollipop stem. Half of the holders are Tootsie Roll Pops and the other half are Charm Blow Pops.

Okay, time to run to the grocery store before I pick up my granddaughter. Have a wonderful day!

Terri
 

Thursday, September 25, 2014

Bright Colored Memos

Today I would like to share another one of my craft show items. These post-it-note holders are so easy to make. I found the tutorial on Pinterest by Katie Adams. Her instructions are very clear which makes it a quick project. You will find her tutorial here.


Now that I have them all put together, I have to decorate them. That's what I will be doing over the weekend. Can't believe the craft show is only 1 week away.

I hope to get a few more cards ready by next Saturday. It has been a challenge because my younger daughter started a job on Monday and I have my 2 year old granddaughter every day from 2:30-7:30pm. I am going to buy some kids stamps, so she can join me in my craft room. Hopefully, she will become my crafting buddy.

Thanks for stopping by today. Don't forget to stop by the Sisterhood and check out the new challenge "Many Layers".


Happy Crafting!

Wednesday, September 24, 2014

Bonjour

Hello everyone! We had some fabulous entries for our "Single Layer" challenge at the Sisterhood, so this week the challenge is "Lots of Layers".  I'm not sure why, but single layer cards are always a real challenge for me. Maybe it's because I using lots of embellishments, such as flowers, gems, ribbons etc.
Vintage is my favorite type of project to create. Now on to my project:


The materials for this card are from Stampin' Up. I used Close to Cocoa for the brown mats and creamy caramel for the lighter color mat. The script is the "French Flair" background stamp and the flowers are from "More Petal Prints" (retired in 2006). The flower, script and dotted panels were sponged with close to cocoa ink to give them a destressed look. Using the 1 1/4" and 1 3/8" created the panel for the "Bonjour" sentiment. Chocolate organdy ribbon ties everything together for a vintage look.


Now it is your turn, so head on over the Sisterhood, check out the inspiration from the sistahs and get busy creating.

I am so happy you stopped to visit with me today. Please come again.

Terri

Monday, September 22, 2014

Craft Show Time

Hello eveyone! My first craft show of the season is just a week away. Today I want to share my "Lil' Miss Glam Kit" with you. I found the tutorial for this cute box on Pinterest. You can find the tutorial by Heidi Baks here. I made some of these boxes filled with a nail file, hand sanitizer and lip gloss for women. Since little girls like to play make up, I decided to fill these boxes with a small emery board, little girl nail polish, lip gloss and fancy ring. I am anxious to see if they will be a good seller. 


I know my 7 year old granddaughter would love to have her own kit. Although her birthday is coming up on the 28th of the month, I think I will save this idea for Christmas. Now I will have to come up with an idea for my grandson.

Okay. That's it for today. Please let me know what you think of my creation. I love receiving comments about my work.

Have a great day!

Terri

Tuesday, September 16, 2014

Butterfly and Bird Notes

This past weekend was spent making more items for my craft show. Today I want to share the note pad and pencil sets I put together. Aren't these papers gorgeous? The cardstock is Stampin' Up, the bird panels are from K & Company and the butterfly panel is from DCWV. The tutorial is courtesy of Darlene and can be found here. (Thanks Dar!) So quick and easy to make and who doesn't need a little note pad in their purse or car. I know I never seem to have a piece of paper when I need it. May have to use one of these myself.


These could be used as a stocking stuffer or as a gift for a co-worker, friend, teacher, etc. My daughters will receiving one for Christmas. I should make one for my husband, but he would forget to take it in the car. (I carry a small purse, because he is always asking me to hold things for him, like his camera, extra batteries, pens, etc.) Maybe I should get him a man bag for Christmas!?

Well, that's it for today. Please stop by and visit with me again. I would love to receive any comments on my work.

Have a great day!

Terri

Monday, September 15, 2014

Snow Day

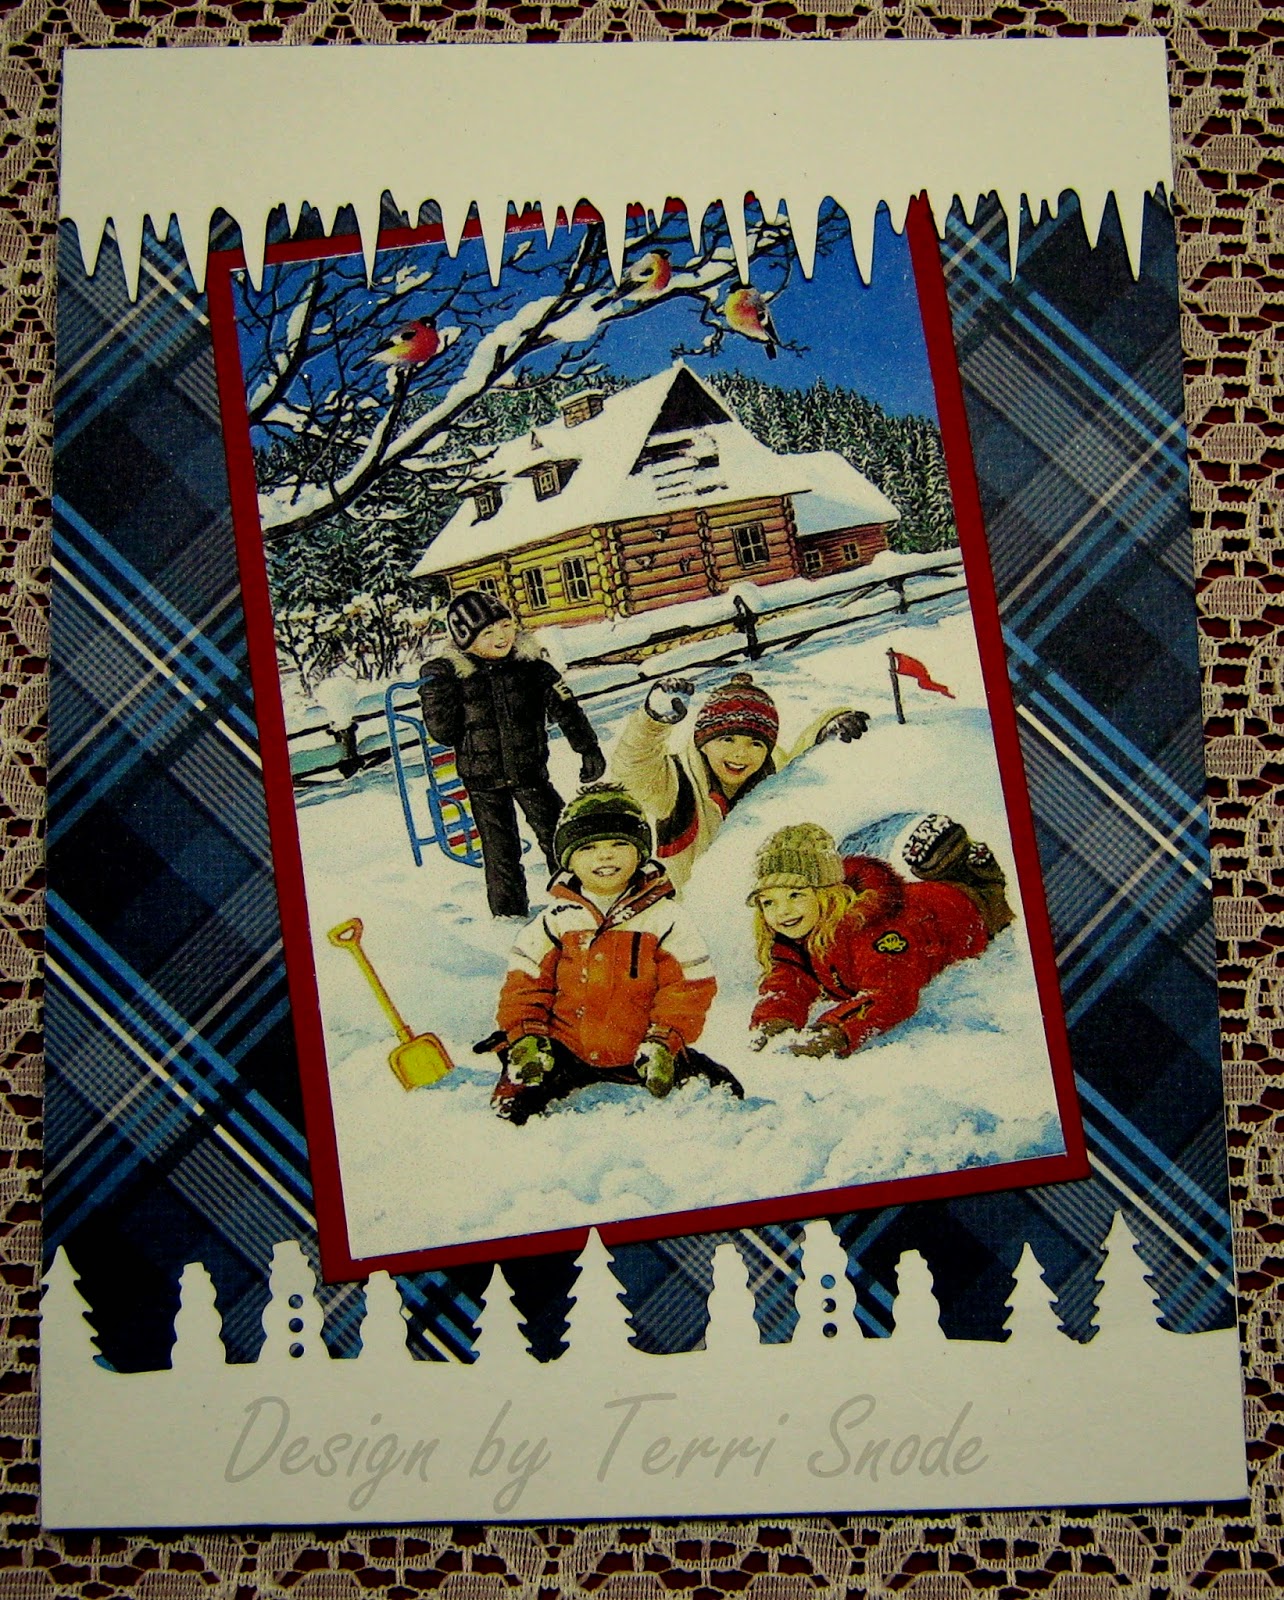
While spending the day with, Darlene, a couple of weeks ago I started making some Christmas/Winter cards. There are so many wonderful images on Pinterest and image reminded me of days spent outside with my two daughters. When we got cold we would come inside and have hot cocoa and cookies. How I miss those days.

I

White cardstock was used for the base and the background paper is from DCWV's winter stack. Darlene was kind enough to let me use her Martha Stewart icycle and snowman/tree punches. The image was layered onto a piece of red cardstock. Now I just need to add the sentiment and maybe some ribbon.

I am certainly not ready for snow, but do hope we have a white Christmas. I love to see how excited my grandchildren get when it starts snowing.

Thanks for visiting today. Happy crafting!

Terri

Thursday, September 11, 2014

Christmas Already?

Can you believe that Christmas is only 3 1/2 months away? With that in mind, I decided to start working on my Christmas cards. I joined the "Stamps of Life" stamp/die club and received my first set of stamps and dies last Friday. There was so much going on in my life over the weekend and today was the first chance I had to play with my new toys. My card was created with the Ornaments4Christmas stamp set and matching dies. Recipe follows the photo.


Recipe:

Cardstock: SU Whisper White, DCWV Foiled Cardstock (blue)
Designer Paper: The Paper Studio Old World Winter stack
Dies: Stamp of Life large Christmas ornament & topper, small Christmas ornament, snowflake disc
Ink: Memento Tuxedo Black
Embellishment: Sheer Ivory Satin Trimmed Ribbon 

I hope I have more time to play with these wonderful stamps and dies tomorrow. There are ten pieces in the stamp set and six dies. I can hardly wait to see what next month's set will be. For now, you can check out this fabulous set here

Thanks for stopping by to visit. Have a great day!

Terri


Wednesday, September 10, 2014

Petite Petals

Sorry I am late in posting. Just never seems to be enough time to get everything done. But here we go with today's project for the Sisterhood's "Single Layer" challenge. A few months ago, I purchased the "Petite Petals" stamp set from Stamin' Up, but never used it. This seemed like the perfect stamps to use for a single layer card and the sentiment (from another unknown stamp set) fits perfectly.  Love all the beautiful ink colors Stampin' Up has to offer. 


Although it is hard to tell from the picture, the ribbon is violet and I used clear self-sticking gems for the  center of each flower. Great idea for when you need a quick card. I may make a few sets of these for note cards using different colors of ribbon and ink.

Now, why not head on over to the Sisterhood and check out my Sistahs creations, then join in on the fun? You could be our next "TOP SISTER" or "TOP THREE" winner.

Happy Crafting!

Terri

Friday, September 5, 2014

Simple Thank You

My project for today is a card I created for our SU stamping group that meets Wednesday, September 10th. Everything used to make the card is from Stampin' Up except the clear gem. The designer paper is now retired, but I still love the double-sided print. The sentiment tag was punched using a 1 3/8" circle punch and the 1 3/8 scalloped circle punch. The sentiment is a stamp from the Simply Sketched set. I used SU's Decorative Dots embossing folder to emboss the background. The bow was made with my envelope punch board.


This would be a beautiful layout for a wedding, anniversary, or thinking of you card, just by changing the embossing folder and sentiment.  Such a simple but elegant project.


Thanks for stopping by today. I would love to hear from you, so if you have time, leave a comment.

Terri