Thursday, November 5, 2020

Quilted with Love

 Hello and welcome to my blog. Today I would like to share my project for the next challenge at the Stinkin' Inkers.

The theme for November is "Quilting". How I would love to have one of my family's homemade quilts. My mother, aunts and grandmother would get together and hand sew quilts. The stitches were so small and perfectly aligned. Unfortunately none of them have survived the many washings.

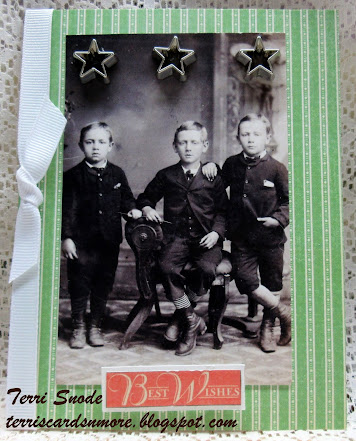
So in memory of my family, I created this card:

Designer paper and teal card stock were cut into 1" x 1" squares and adhered onto a white card stock base in a quilt pattern. Next the card front was embossed with this beautiful pattern. Prima paper flowers were added to the top left corner and then a pearl spray was adhered under the sentiment panel.

 Thank you for stopping by today. If you have a chance, hop on over to the Stinkin' Inkers challenge blog for more inspiration from the Design Team and enter your own creation.

Have a great day!

Terri

Thursday, September 3, 2020

Three Boys

The challenge at the Stinkin' Inkers this month is "Times 3". I found this Tim Holtz vintage photo in my stash and knew it would be perfect for this theme.


 The base is white card stock with a of mint green striped designer paper mat. 

Next I added the photo and 3 silver stars and the sentiment mounted on white card stock. Last I added  white grosgrain ribbon tied in a knot. Once I have decided what occasion this card fits, I will add a sentiment on the inside. 

Thanks for stopping by and visiting with me today. If you have a chance, head over to the Stinkin' Inkers and join in on the fun. 

Monday, June 1, 2020

Hello

I hope you had a great weekend. I have another card to share with you today. Recently, I purchased the new Diamond Press Mini embossing and die cutting machine with stamp set and dies from HSN. I couldn't wait to try it out.

So here is my first project.
The base card is white card stock. Using a piece of paper from the DCWV Floral Foliage paper pad, I used the frame die to cut a light pink panel. The "Hello" was cut using a die from the bundle as were the flowers. I used tape runner to adhere the yellow/pink flower and ivory stems. Then the pink/yellow flower and butterfly were adhered with pop up dots. The antennae for the butterfly was created by cutting apart a floral wedding pick. The leaves were attached to the flowers before adhering to the card. The purple ribbon is from Really Reasonable Ribbon.

When I ordered my Diamond Press, I also signed up for auto ship and will receive 6 more stamp/die bundles which will be shipped bi-monthly.

I am really having fun with this bundle. Hope you like my project and will stop by again.

Hugs,
Terri

Thursday, May 7, 2020

Bag It!

Hello, everyone! Today I would like to share my project for the challenge at the Stinkin' Inkers. The theme is "In The Bag". Create a bag, tote, purse or other project using one of these as your focal point.

I know I found a tutorial on Pinterest for this bag made from a 12 x 12 sheet of paper, unfortunately I forgot to save it to my board. However, there are a lot of other bag tutorials to choose from on youtube.


I chose this piece of red/white designer paper for the body of the bag and a strip of red for the top. Using a 1/4" punch I created 2 holes for the gold ribbon. Very easy project.

Why not head on over to the Stinkin' Inkers and enter your project?

Have a great day!
Terri

Friday, May 1, 2020

Travel Escape

 Welcome back to my blog. Today's project is a masculine card.

The base started as a gate fold card, but folded forward to create a tent fold. Script designer paper was adhered to the inside and then the ship's wheel and checked designer paper was adhered to both panels of the gate fold. I also added a strip of the checked paper across the script paper and added blue/white twine to hold the tent fold up. The globe (from Stampin' Up's "the Ocean Sea" stamp set) is stamped in denim ink and matted with a blue scalloped circle. the sentiment is from the pad of designer paper and adhered to a tag with blue and white twine.

This card would be perfect for Birthday, Retirement, Graduation, etc. I definitely be using this fold for other cards.

Thanks for stopping and visiting with me today.

Hugs,
Terri 

Thursday, April 30, 2020

Small Masculine Note Pads

I would like to share some of the projects that I have been working on lately. Hoping to do some craft shows this fall if the corona virus doesn't cause cancellations.

My first project is some note pads for the guys. They are 3" x 5" and will have a pen included.


The designer paper used is from the "Explore" pad by Authentique Paper and the "Getaway" pad by Echo Park. The sentiment panels are also from these pads.

I cut a 6" x 3" strip from the designer paper, lined it up at the bottom of the pad and folded the extra over the top of the pad and glued it down to cover the glued portion and the back of the top. The gold grosgrain ribbon is from a roll I have had in my stash forever and the red ribbon is from the Really Reasonable Ribbon.

Please stop by tomorrow for a look at a card I created with these designer papers.

Hugs,
Terri


Thursday, March 5, 2020

Finally Back

Hello, everyone. It feels good to get back to crafting and blogging. 2019 was not a good year for my husband and I. Hubby went out for a walk (while I was at work),had a vertigo attack and fell and broke his left kneecap into 3 pieces. Thankfully, a neighbor and her husband were home, saw him and got him home. They tried to get him to go to the emergency room, but he wanted to wait for me.

Well, after 4 days in the hospital - one month in a community care facility and 2 operations, he finally came home. Then 6 months later, he had to have a third surgery because one of the wires had broken. After 10 1/2 months of no walking without a crutch or walker he has finally healed.

With all of that being said, I would like to share my project for the Stinkin' Inkers Challenge for this month. Our theme is "Pastel Pallette".

My mind was on spring when I decided on this theme. I can't wait till all the spring flowers begin to bloom and I can feel the warmth of the sun on my head.
To create this Z-fold card, I started with light pink card stock for the base and added a light teal mat under the pastel watercolor flower designer paper. Next I added the paper flowers, added white pearls to the center of each, stamped the inside flower with black ink and used markers to color in the image. This would be a beautiful card to let someone know you are thinking of them.

Thank you for stopping by today. If you are looking for a fun challenge, be sure to stop by the Stinkin' Inkers challenge blog and share your pastel creations with us.

Until next time,
Hugs,
Terri