Wednesday, December 10, 2014

Christmas Song Inspired

The Sisterhood's new challenge begins today and the title is "Christmas Name That Tune". The idea is to make a project that was inspired by a favorite Christmas song. I have 2 cards to share with you, because I have so many favorites. My top favorite is "Silent Night" which inspired me to use this stamp by Stampendous called "Sacred Silhouette". The verse inside says "Silent Nght, peaceful morn, joy to all, Christ is born!" on a stamp by Wordsworth. The blue cardstock was purchased at Hollo's paper store and has flecks of white that look like snow. I heat embossed with gold embossing powder and framed the image with gold metallic cardstock. Then I tied gold metallic ribbon as an embellishment.


 My husband wasn't too happy when I walked around the house singing, "Let It Snow, Let It Snow, Let It Snow", from the beginning of November until mid January, because we had more snow than we have had since my daughter's were in school. My youngest daughter graduated from high school in 2003. Eventually, he told me I had to take down the snowmen and quit singing that song. (I guess he didn't want snow to last until Summer.)


Here are the details for my second card:

White cardstock was used for the base and the designer paper is by DCWV. I found the image on Pinterest. My friend, Darlene, let me use two of her Martha Stewart snowfake punches to embellish and I used my SU Bitty Banners Die to cut the sentiment banner. Darlene also gave me some red paper since I didn't have any with me at the time.


This is the Sisterhood's last challenge for the year. We will begin challenges again on January 10, 2015. The sisters are taking a well-deserved rest and spending time with their families. 

What are you waiting for? Stop by the Sisterhood for inspiration and get into your craft room and create. We can't wait to see all of your wonderful work.

Thank you for supporting us this past year. Hope to see you in January.

Terri
Wednesday, November 26, 2014

Santa's Coming

Is it true? Christmas is only a month and a half away? Believe it or not, yes, Christmas will soon be here. I love seeing the excitement in my grandchildren's eyes as they await the arrival of that guy in the red suit, black boots and white beard. Thankfully, I started my Christmas shopping early and I am almost done. I hit some good sales at Kohl's, so picked up Christmas gifts while shopping for birthday presents. I guess it's a good idea to have so many birthdays close together. Now to finish my Christmas cards.

The challenge at the Sisterhood this week is "Santa Claus is Coming to Town". As usual, I found this adorable picture of Santa on Pinterest and just had to use him as the focus. Also, I steered away from the traditional colors of red and green and went for a more vintage look. You will find the details below the photo.


 Details:

Cardstock: SU Kraft, Core'dinations Chocolate

Dies: Sissix Labels Four

Designer Paper: K & Company

Sentiment: Scrappy Cat

Ribbon: Chocolate gingham

Embellishments: Echo Park Co. Reflections Christmas chipboard snowflakes


Soon the snow will be flying, Christmas music will be playing and the Christmas movies will begin. Guess I'd better get busy on my Christmas cards, so I have time to decorate and bake cookies. Christmas will be here quicker than you can blink your eyes. 

Don't forget to head over to the Sisterhood for more inspiration and share your project with us. You just might be one of our top winners. While there, leave a little love for the sistah's.

I love to hear from you, so if you have time leave a comment.

Until next time, have a great day.

Terri


Thursday, November 13, 2014

Germ Free Santa

Hello everyone! This year for Christmas I want my friends and family to stay healthy, so I am giving them these adorable "SANTA-tizer" gifts. So cute and very easy to make. You will find the video tutorial here. I found the antibacterial hand sanitizer at our local dollar store (3 in a pack).


I used a strip of SU Real Red cardstock (2 1/4" x 6") to go around the bottle and secured with red line tape. The belt is a strip of black paper 3/4" wide, wrapped around the bottle  and secured in the front. The buckle is silver metallic paper 3/4" x 3/4" and secured with a glue dot to cover the seam. For Santa's face, I used a 1 1/4" circle punch and flesh colored paper. folded in half. I typed the "Santa-tizer" onto white cardstock, then used a 1 3/8" scallop punch to make the beard. (Try to get the word towards the bottom when punching.) Santa's hat is made from a 1 1/4" square punch, cut in half diagonally. One side of the triangle is clipped off, and add a 1/4" white circle to the other side. Glue the hat to Santa's head and add eyes with a black marker. I used SU red/white bakers twine to tie the head onto the bottle cap.

Won't these make great stocking stuffers? I want to make more for my craft shows next year. I think they would be good sellers.

Have you checked out the "Thankful" challenge at the Sisterhood? Just create a project and use a phrase or sentiment such as, "Thankful, Give Thanks, etc.) Stop by the Sisterhood for some fantastic inspiration by our sistahs.

Have a great day and Happy Crafting.


Wednesday, November 12, 2014

Giving Thanks

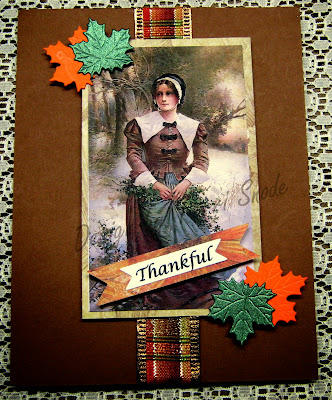
I am so blessed to be hostess for this week's  "Thankful" challenge over at the Sisterhood. My hubby and I have had so many blessings this year. Our family is happy and healthy and my older daughter presented us with a beautiful new granddaughter on April 5th. We are also Thankful that both of our daughters and families live nearby, so we get to see them quite often.

With that in mind, here is my creation for the challenge.


The card base is Core'dinations Chocolate and the plaid wired ribbon is from Bobbie M Designs (found at a local craft store.) I used Impression Obsession's mini leaves (can be purchased from diesrus.com) die to cut the maple leaves from green metallic paper and SU Pumpkin Pie cardstock. The sentiment tag was cut using SU's Bitty Banners dies. Isn't this image beautiful? If found it on Pinterest and decided it was exactly what I needed for this project.

Fall is my favorite time of the year and Thanksgiving is my favorite holiday, so this was the perfect challenge for me to host.

Now, why not head over to the Sisterhood and check out the other sistahs creations? You will definitely be inspired by their fantastic work. Then get busy creating and enter for your chance to be one of the Top Award winners.

Thanks for stopping by.

Terri

Monday, November 10, 2014

Chapstick Purse

It was wonderful getting into my craft room today and actually getting to craft. I had to make one more owl card for my swap on Wednesday, then it was on to more Christmas ideas. Today I worked on this cute Chapstick Purse. It will be perfect for stocking stuffers and I will make some for craft shows. You can find the tutorial for this project here:


Super easy to make from a 2 3/4" x 4 1/2" piece of cardstock. Then scored on the 4 1/2" side at 1", 1 3/4" and 3 1/4". I used a Fiskars Scallop punch and 1/4" ribbon for the handle. I cut velcro dots in 1/2 to make the closure. The embellishments are by Jolee's Boutique.

Aren't they adorable? Now I just have to decide what to make next. I have so many ideas, I don't know where to start.

Don't forget the new Sisterhood challenge begins on Wednesday. Make sure to stop by the Sisterhood to see the wonderful creations by the sistahs, then enter your project for a chance to win one of our top awards.

Have a great day.
Terri 


Wednesday, November 5, 2014

Not Again

Monday evening my husband came home from work complaining about severe pain in his left foot. When he removed his shoe, we noticed his foot was terribly swollen. Since he was diagnosed with osteoporosis, I suggested going to the emergency room. Being stubborn, he wanted to wait until morning to see if it felt better. Around 7:30am yesterday, he got me up and wanted to go to the hospital. Just as I thought, he has a fracture in his foot and will be off work for 6-8 weeks. Please pray for strength as I try to take care of him, my granddaughter and 3 dogs. (Believe me, the granddaughter and 3 dogs are easier to take care of than my husband.)

I am hoping to have everything settled down enough by the weekend, so I can get back into my craft  room. I have so many things I want to work on and little time.

Have a great day everyone!
Terri

Thursday, October 30, 2014

Vintage Best Wishes

Feeling a little nostalgic today as I remember all the fun times I had with my Aunt Donnie. I spent almost every weekend with her. We baked cookies, made popcorn, watched movies and played board games. In the summer, we would pick flowers from her garden to make flower arrangements for her church. Sometimes we would pack up the car and head to my cousin's house in Lakewood, Ohio for the weekend. So my project today is a birthday card, inspired by her.


White card stock was used for the base. The background paper and sentiment came from a scrapbooking pack that I have had forever. The pink card stock is Stampin' Up and the brown is Core'dinations Chocolate. The image was found on Pinterest.

I just purchased this Spellbinders Wrought Iron fence over the weekend and couldn't wait to use it. I love how it adds to the vintage look of my card. The flowers are paper flowers from the wedding department of a local craft store. I am very happy with the end product.

Well, that's it for today. Time to pick up my 2 year old granddaughter. I will be taking her trick or treating tonight because her mommy has to work. This will be her first time and I am so excited to be the one to take her.

Have a great day! Happy Crafting!

Terri


Tuesday, October 28, 2014

Happy Fall

Didn't have a lot of time for crafting last week. Beside babysitting my 2 year old granddaughter, I helped decorate and attend a baby shower for my friend, Judy's, daughter. Then I helped with a Halloween Party at our local library and attended a Halloween Party on Saturday. Now I am trying to catch up on my crafting.

Last night I decided to try my hand at CASE-ing a card I saw on Pinterest. You can see the original card here. The details for my card follow the picture.


Recipe:

Cardstock: SU white, always artichoke, pacific point

Designer Paper: SU Brights Collection

Punches: 1 1/4" circle, 1 3/8" scalloped circle, Owl, Bird


The sentiment was typed on my computer and then punched with the circle punches and adhered to the card with dimensionals.

 This will be my swap for our Stamp club meeting in November. I love getting together with this group
of ladies every month. Lots of good food and inspiration.

Well, that's all I have for today. Don't forget to stop by the Sisterhood and check out the new challenge.

Terri

Wednesday, October 22, 2014

Fall Days

I am exicited to share my project for the Sisterhood challenge "Fall Colors" with you today. Fall has always been my favorite time of the year. I love all the reds, oranges and yellows against a blue sky.
The basket was made using my Envelope Punch Board and Stampin' Up old olive cardstock and DCWV fall designer paper. The stamp set is SU's "Autumn Leaf Print" stamp set and Real Red, Pumpkin Orange and Old Olive SU markers. Pop dots lift the rough cut leaves for dimension and topped of with orange and green grosgrain ribbon bow. The leaf vine across the handle was purchased at a local craft store in the ribbon department.

It would make a beautiful center piece for a table or a nice gift for that someone special. It is such an easy project, I will definitely be making more for friends and family.


Tuesday, October 21, 2014

Make A Wish

My project for today is a fall birthday card. This picture doesn't show the true beauty of the image I found on Pinterest. (I really need to find a better place for my photo box, so I can get the proper lighting.)


Details:

Cardstock: White for the base, Chocolate (Core'dinations)

Designer Paper: DCWV's Amber Autumn Stack

Sentiment stamp: Make a Wish (don't know the manufacturer)

Die Cut: Memory Box "Lovely Tendril"

Embellishment: Pumpking Ribbon


I found a few more similar pictures to use on projects. I will be using them for birthday, Thanksgiving and general fall projects.

Thanks for visiting. Please stop by again soon.

Terri

Wednesday, October 15, 2014

Simple Birthday

Hello everyone. Today's project is a simple birthday card. I just received my order from Stampin' Up and couldn't wait to create with the Flower Shop stamp set and pansy punch.


I used my Spectrum Noire markers to color the flowers and used the blender pen to make them look like watercolor. White cardstock was used for the base and the designer paper is from DCWV. SU Blue Ballet and Core'dinations black cardstock were used for the mat behind the flowers. The sentiment stamp is from Stampin' Up.

I have been trying to get up early, so I can work on projects in the morning before my 2 year old granddaughter gets here. I may have to add a little table in my craft room for her and then she can be my crafting buddy. For now, her attention span is very short, so she jumps around from one thing to another every couple of minutes. But, I wouldn't want her any other way.

Well, that's all I have for today. Stop by again soon.

Terri

Tuesday, October 14, 2014

Season of Thanks

Fall has always been my favorite time of the year. All those beautiful bright flowers and leaves. I have so much to be Thankful for this year. Good friends, healthy, happy family, four beautiful fun-loving grandchildren and other God-given blessings. I want to share a Thanksgiving card with you today. It is very simple, but I think quite elegant. The recipe follows the photo.


 Recipe:

Cardstock: SU White, SU Marigold Morning

Designer Paper: DCWV Amber Autumn Stack

Sentiment: SU Holidays and Wishes (2007)

 Embellishments: Chocolate Organdy Ribbon, Chocolate Gingham Ribbon, Gold Leaf Button


The focal image was found on Pinterest


I hope you have time to get out and enjoy the beautiful fall weather. Temperature for today here in Northeast Ohio is 75 degrees and tomorrow the high is supposed to be 79 degrees with isolated thunderstorms. Then back down to the 50's and 60's.

Don't forget to stop by the Sisterhood and check out the new challenge "Think Pink" in honor of Breast Cancer Awareness month.

Thanks for visiting.

Terri


Thursday, October 9, 2014

Craft Show Pics

Hello friends. Sorry I haven't posted much lately. Last week was busy with babysitting and finishing items for my craft show on Saturday.  Here are some pics of my set up:


Rain (or should I say "downpours) kept people away for most of the day. Some of the customers said  some areas had snow or hail. However, I am pleased with the outcome of my first show. I made enough to cover the cost of my space and a profit of $20.00. Most of my sales were on $1.50 and $2.50 items.

Now I am preparing for a craft show on November 22nd. Hopefully, the weather will cooperate and more people will attend.

That's it for today. Thanks for stopping by and visiting.

Terri


Wednesday, October 8, 2014

Think Pink

Hello, everyone! Hope you are having a wonderful day. The new challenge beginning today at the Sisterhood is "Think Pink" in honor of Breast Cancer Month. My mother's baby sister died of breast cancer when she was 38 years old. My mom died of complications of thyroid cancer, my older sister died of lung cancer and my other sister died of pancreatic cancer. I have had this stamp set for quite awhile and never used it, so this was the perfect challenge.

Now for my card and the details.


Recipe:
Cardstock: SU white and Pink Passion
Die: Sizzix Scallop frame
Ink: SU Pink Passion
Embellishments: Pearl bridal spray, pink gingham ribbon

Okay, now it's your turnl. Head over to the Sisterhood for more inspiration from the Sistahs, then share your project with us. You could be one of the top award winners.

Please visit again soon.

Terri

Friday, September 26, 2014

Lollipop, Lollipop

Hi friends! We have had such beautiful weather her in Northeastern Ohio for the past few days. My granddaughter and I have been taking lots of walks, visiting the library and going to the park. Trying to enjoy the nice days before the cold weather arrives.

My project today is a lollipop holder that I found on Pinterest (of course). Isn't this lollipop holder the cutest? You can find the tutorial here.  It is a quick and easy project.


 (front)

(side)


Stampin' Up cardstock was used for the base. Then I used my 1 1/4" circle punch for the circle and my 
1 3/8" scalloped punch for the frame. White woven ribbon was tied in a bow around the lollipop stem. Half of the holders are Tootsie Roll Pops and the other half are Charm Blow Pops.

Okay, time to run to the grocery store before I pick up my granddaughter. Have a wonderful day!

Terri


Thursday, September 25, 2014

Bright Colored Memos

Today I would like to share another one of my craft show items. These post-it-note holders are so easy to make. I found the tutorial on Pinterest by Katie Adams. Her instructions are very clear which makes it a quick project. You will find her tutorial here.


Now that I have them all put together, I have to decorate them. That's what I will be doing over the weekend. Can't believe the craft show is only 1 week away.

I hope to get a few more cards ready by next Saturday. It has been a challenge because my younger daughter started a job on Monday and I have my 2 year old granddaughter every day from 2:30-7:30pm. I am going to buy some kids stamps, so she can join me in my craft room. Hopefully, she will become my crafting buddy.

Thanks for stopping by today. Don't forget to stop by the Sisterhood and check out the new challenge "Many Layers".


Happy Crafting!

Wednesday, September 24, 2014

Bonjour

Hello everyone! We had some fabulous entries for our "Single Layer" challenge at the Sisterhood, so this week the challenge is "Lots of Layers".  I'm not sure why, but single layer cards are always a real challenge for me. Maybe it's because I using lots of embellishments, such as flowers, gems, ribbons etc.
Vintage is my favorite type of project to create. Now on to my project:


The materials for this card are from Stampin' Up. I used Close to Cocoa for the brown mats and creamy caramel for the lighter color mat. The script is the "French Flair" background stamp and the flowers are from "More Petal Prints" (retired in 2006). The flower, script and dotted panels were sponged with close to cocoa ink to give them a destressed look. Using the 1 1/4" and 1 3/8" created the panel for the "Bonjour" sentiment. Chocolate organdy ribbon ties everything together for a vintage look.


Now it is your turn, so head on over the Sisterhood, check out the inspiration from the sistahs and get busy creating.

I am so happy you stopped to visit with me today. Please come again.

Terri

Monday, September 22, 2014

Craft Show Time

Hello eveyone! My first craft show of the season is just a week away. Today I want to share my "Lil' Miss Glam Kit" with you. I found the tutorial for this cute box on Pinterest. You can find the tutorial by Heidi Baks here. I made some of these boxes filled with a nail file, hand sanitizer and lip gloss for women. Since little girls like to play make up, I decided to fill these boxes with a small emery board, little girl nail polish, lip gloss and fancy ring. I am anxious to see if they will be a good seller. 


I know my 7 year old granddaughter would love to have her own kit. Although her birthday is coming up on the 28th of the month, I think I will save this idea for Christmas. Now I will have to come up with an idea for my grandson.

Okay. That's it for today. Please let me know what you think of my creation. I love receiving comments about my work.

Have a great day!

Terri

Tuesday, September 16, 2014

Butterfly and Bird Notes

This past weekend was spent making more items for my craft show. Today I want to share the note pad and pencil sets I put together. Aren't these papers gorgeous? The cardstock is Stampin' Up, the bird panels are from K & Company and the butterfly panel is from DCWV. The tutorial is courtesy of Darlene and can be found here. (Thanks Dar!) So quick and easy to make and who doesn't need a little note pad in their purse or car. I know I never seem to have a piece of paper when I need it. May have to use one of these myself.


These could be used as a stocking stuffer or as a gift for a co-worker, friend, teacher, etc. My daughters will receiving one for Christmas. I should make one for my husband, but he would forget to take it in the car. (I carry a small purse, because he is always asking me to hold things for him, like his camera, extra batteries, pens, etc.) Maybe I should get him a man bag for Christmas!?

Well, that's it for today. Please stop by and visit with me again. I would love to receive any comments on my work.

Have a great day!

Terri

Monday, September 15, 2014

Snow Day

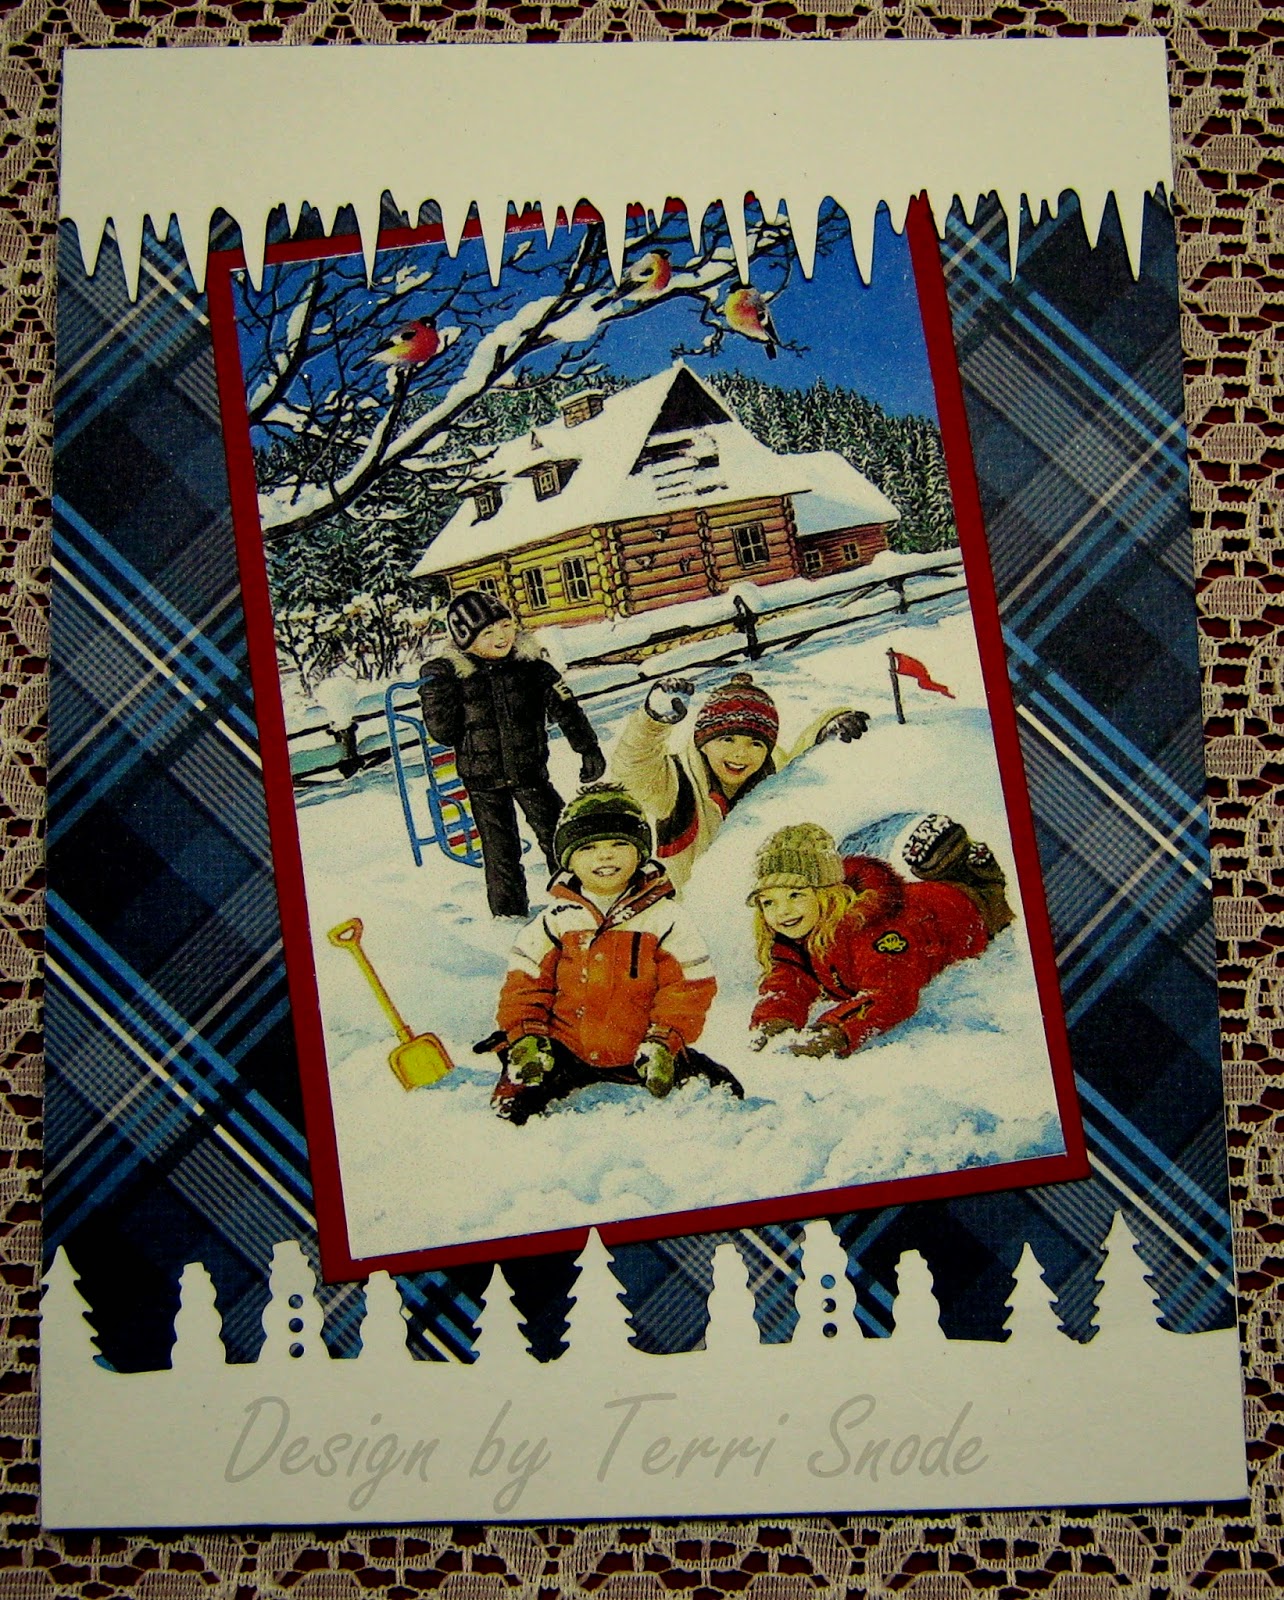
While spending the day with, Darlene, a couple of weeks ago I started making some Christmas/Winter cards. There are so many wonderful images on Pinterest and image reminded me of days spent outside with my two daughters. When we got cold we would come inside and have hot cocoa and cookies. How I miss those days.

I

White cardstock was used for the base and the background paper is from DCWV's winter stack. Darlene was kind enough to let me use her Martha Stewart icycle and snowman/tree punches. The image was layered onto a piece of red cardstock. Now I just need to add the sentiment and maybe some ribbon.

I am certainly not ready for snow, but do hope we have a white Christmas. I love to see how excited my grandchildren get when it starts snowing.

Thanks for visiting today. Happy crafting!

Terri

Thursday, September 11, 2014

Christmas Already?

Can you believe that Christmas is only 3 1/2 months away? With that in mind, I decided to start working on my Christmas cards. I joined the "Stamps of Life" stamp/die club and received my first set of stamps and dies last Friday. There was so much going on in my life over the weekend and today was the first chance I had to play with my new toys. My card was created with the Ornaments4Christmas stamp set and matching dies. Recipe follows the photo.


Recipe:

Cardstock: SU Whisper White, DCWV Foiled Cardstock (blue)
Designer Paper: The Paper Studio Old World Winter stack
Dies: Stamp of Life large Christmas ornament & topper, small Christmas ornament, snowflake disc
Ink: Memento Tuxedo Black
Embellishment: Sheer Ivory Satin Trimmed Ribbon 

I hope I have more time to play with these wonderful stamps and dies tomorrow. There are ten pieces in the stamp set and six dies. I can hardly wait to see what next month's set will be. For now, you can check out this fabulous set here

Thanks for stopping by to visit. Have a great day!

Terri


Wednesday, September 10, 2014

Petite Petals

Sorry I am late in posting. Just never seems to be enough time to get everything done. But here we go with today's project for the Sisterhood's "Single Layer" challenge. A few months ago, I purchased the "Petite Petals" stamp set from Stamin' Up, but never used it. This seemed like the perfect stamps to use for a single layer card and the sentiment (from another unknown stamp set) fits perfectly.  Love all the beautiful ink colors Stampin' Up has to offer. 


Although it is hard to tell from the picture, the ribbon is violet and I used clear self-sticking gems for the  center of each flower. Great idea for when you need a quick card. I may make a few sets of these for note cards using different colors of ribbon and ink.

Now, why not head on over to the Sisterhood and check out my Sistahs creations, then join in on the fun? You could be our next "TOP SISTER" or "TOP THREE" winner.

Happy Crafting!

Terri

Friday, September 5, 2014

Simple Thank You

My project for today is a card I created for our SU stamping group that meets Wednesday, September 10th. Everything used to make the card is from Stampin' Up except the clear gem. The designer paper is now retired, but I still love the double-sided print. The sentiment tag was punched using a 1 3/8" circle punch and the 1 3/8 scalloped circle punch. The sentiment is a stamp from the Simply Sketched set. I used SU's Decorative Dots embossing folder to emboss the background. The bow was made with my envelope punch board.


This would be a beautiful layout for a wedding, anniversary, or thinking of you card, just by changing the embossing folder and sentiment.  Such a simple but elegant project.


Thanks for stopping by today. I would love to hear from you, so if you have time, leave a comment.

Terri

Thursday, August 28, 2014

Double Dutch

There are so many fancy fold cards on Pinterest and I have been trying to get brave enough to make some. So today I want to share a double dutch card. It was so easy to make and I really like the way it turned out. Wish I had spotted this card before I did my project for the Sisterhood's challenge "Fancy Folds", which I am hosting.

 closed

 half opened


open


Recipe:

Cardstock: White, SU Soft Plum, Black
Ink: Soft Plum
Embossing Folder: Darice 
Dies: Nestibilities Ovals, Scalloped Ovals, Labels Five, Memory Box Butterfly
Punch: Martha Stewart Eyelet Scallop Punch
Embellishments: White Wedding Flowers

When I embossed my top fold, I didn't realize that I had the embossing folder turned the wrong way, so it is debossed. But I thought it looked kinda nice that way and left it. The frame for the sentiment panel was sponged with SU soft plum ink. I also sponged the flower with the soft plum. I found the image and the sentiment on Pinterest.

It is hard to tell from the picture, but the butterfly was cut from white and soft plum cardstock, then glued together for dimension. The body and antenna were cut from black cardstock. Now that I know how easy this card is to make, I will definitely be creating more.

Don't forget to stop by the Sisterhood and check out the new challenge "Fancy Fold" cards. The Sistahs have some fantastic projects for inspiration. 

Thanks for visiting with me today.

Terri


Wednesday, August 27, 2014

Open the Gate

I am so excited to be the hostess for the Sisterhood of Crafters challenge this week. I always forget about all the different ways to fold cards, so this will be a great challenge for me. I decided to make a gate fold card. (One of these days, I might get brave enough to try a step card.) Now for the details of my project.

closed


open


Recipe:

Cardstock: Teal, White

Designer Paper: Colorbok Jewel Box

Dies: Labels One

Punches: Large and Small Tag Punches

Ink: Momento Black

Embellishments: Large rose and white lace


Okay, now it's your turn. Head on over to the Sisterhood for more inspiration from the "sistahs" and enter your creations. Who knows, you could be our next "Top Sister".

Terri

Monday, August 25, 2014

Make a Note

I have been fighting an ear infection all weekend and just didn't feel much like working on projects. When my hubby and I went to the grocery store I purchased some ear drops and that helped to get me into the mood for crafting. Darlene has a fabulous tutorial for these notepads and I just had to try them. They are super easy and will make wonderful gifts or craft show items. You can find the tutorial here.  Now for my creations:


For the note pad holder I used SU and Core'dinations cardstock as the base. The designer papers are from various companies also, such as DCWV, K & Company, etc. The embellishments are from Tim Holtz, Minds Eye and K & Company. The stamp was from a 3 pack of stamps purchased for $2.00 at Michaels.
I will package the note pads in a plastic bag along with a pencil or pen.

I need to get all of my craft items together and see how much I have to sell. I'm sure I will need to make more of everything, but want to concentrate on what I need the most.

That's it for today. I think I need to use my ear drops again and lay down for awhile. Don't forget to stop by the Sisterhood on Wednesday for our next challenge.

Terri

Friday, August 22, 2014

Bubble, Bubble, Toil and Trouble

Still working on items for my craft show in October and wanted to share these gum pack covers with you. All of the images were made using the 1 3/8" scallop punch and wiggle eyes.


Instructions:

1. Cut cardstock 3" by 6 1/2". 
2. Score on the long side at 1 1/2", 2", 4 1/2" and 5".
3. Wrap cardstock around "Extra" bubble gum and secure with sticky tape.
4. Decorate as desired. 

Easy and quick craft for all those little monsters that show up at your door on Halloween. Unfortunately, we don't get trick or treaters on our street. There are only 5 houses on our street and the kids are all grown up. My grandchildren will get these in their Halloween treat baskets.

Okay, off to work on more craft show items. If you make any of these covers, I would love to see pictures of your creations.

As always, thanks for stopping by.

Terri

Wednesday, August 20, 2014

Trick or Treat

Yesterday I started working on some Halloween treats for a craft show on October 4th. Normally, I don't do Halloween, but since this craft show is early I decided I should do a few items for the kids. Will also make some for my grandchildren. This Hershey bar slider is a very quick and simple project. My friend, Darlene, has a tutorial here


I used cardstock from various companies (Stampin' Up, DCWV, Coredinations) and the image stamps I picked up for $1.00 at a local scrapbooking store. 

I also need to work on more cards (of all types), Hersey bar sliders, gum pack wrappers, nugget boxes, travel kleenex boxes and other items for Christmas craft shows. As the saying goes "so much to do and so little time."

Thanks for visiting with me today and don't forget to stop by the Sisterhood for our "Favorite Color" challenge. You have until 8pm Sunday, August 24th to enter.

Terri

Monday, August 18, 2014

Nail It

Hello everyone! Today I would like to share a project that caught my eye on Pinterest. Thought this would make a great stocking stuffer or maybe a simple gift for a co-worker, hair dresser, etc. The tutorial for this box is by Heidi Baks and can be found here. A big thanks to Heidi for sharing this idea. This is an easy quick project. I think I will cut out a few boxes and put them together while watching TV with my husband. They should do well at craft shows, just need to decide on a price. Tomorrow I will have to purchase some small bottles of lotion and emery boards to put in them.

The box is cut from SU Marigold Morning cardstock and the designer paper is from DCWV's Floral Fair paper stack. Blue satin ribbon was tied around the bottle. I used the 3/4" circle punch from SU for the hole on the back panel. That's all there is to it.

Have I motivated you to give this project a try? Let me know what you think. I love receiving comments about my work.

Stop by again soon.

Terri
 

Thursday, August 14, 2014

Chipboard Coaster Post-It-Note Holder

When organizing my craft room, I found my chipboard coasters and decided to start making projects with them again. It has been 2 years since I used them. You know the old saying, "Out of sight, out of mind." Time to start using some of those materials that had been packed away and are now neatly organized so I can find them. This project is soooo easy. Just need Mod Podge, brush, designer paper, 4" x 4" chipboard coasters (purchased my from ebay) and post-it-notes. 


I think I will make some of these as stocking stuffers for my family and give them as gifts to my friends. They will also be sold at craft shows. I added paper flowers with glue dots and tied the ribbon around a clip. The designer paper is by DCWV and has been in my stash forever.

Well, time to get ready for my stamp group meeting to night. Thanks for dropping by and visiting.

Don't forget to stop by the Sisterhood and join in our new challenge using your "Favorite Color". The sistah's have provided some wonderful projects for inspiration.

Have a great day.

Terri
 

Wednesday, August 13, 2014

Choose Your Color

Today's challenge at the Sisterhood of Crafters is to use your "favorite color". My family and most of my friends know that blue is my favorite color. I found this tutorial by Diane Dimich on YouTube and decided to give it a try. The box is made using the Envelope Punch Board and SU's  Score Plate. Diane takes you through step by step and makes it so easy to create the matchbox. Depending on how you decorate your box, it could be used for birthday, wedding, anniversary, Halloween or baby shower favors. I will definitely be making more.


Here's the recipe:

Cardstock: SU Brights Collection double sided 
                        SU Turquois
                  Silver

Die: Memory Box Whimsy Circle

Flowers: Mikies Flower Favor Embellishments

Why not stop by the Sisterhood and play along? The "sistahs" have some beautiful creations to give you more inspiration.

Until next time...

Terri

Tuesday, August 12, 2014

When Will It End

What a week this has been!! One of our dogs has been sick, so after a trip to the vet, two meds, change in diet and hoping that within a couple of weeks she is back to normal. Unfortunately, we have to keep her in the garage for now. Just thankful we are dealing with this now and not over the winter months. Then my hubby's car started having issues, so we decided to trade it in. The paper work for the new (used) car should be completed tomorrow. While starting to buy groceries yesterday, my younger daughter called and asked if I could pick her up and take her to my granddaughter's check up because just as she started to leave the house, it was a down pour. She doesn't drive and didn't have an umbrella. So grocery shopping will have to be done  sometime today along with a haircut. I am in withdrawal because I haven't been able to do any crafting. I am going to try to get some crafting done this afternoon and evening while hubby is at work. My order from Stampin' Up cardstock arrived yesterday and I can't wait to start using it. Hope to have some new projects to share with you tomorrow. 

Until then...

Terri

Friday, August 8, 2014

Step Up

Today I would like to share a card that I made for my oldest granddaughter's birthday. She will turn 7 on September 28th and she is becoming quite the young lady. I asked her what she wanted for her birthday and she replied, "Gragra, it's supposed to be a secret." After explaining I just needed to know if she likes to make crafts, read or play with something special, I got the following answer. "I like anything Barbie or Tinkerbell, books on a Level 1-2 and making crafts. Now on to the card:


The card base is white cardstock and the designer paper for the background and the flower panels is from DCWV's Flower Shower Spring Stack. The frame around the image was cut using a Nestibilities scalloped die from SU Old Olive cardstock. Both sentiments came from a free stamp set I received with a UK Papercrafts magazine. I used a Martha Stewart punch for the picket fence and the flowers are from Petaloo. Joann Craft Store colored pencils were used to color the image that was stamped with Memento Tuxedo Black Ink.

With the card done, now I just have to shop for her gifts.

Thanks for spending time with me today. Stop by again soon.

Terri 
 

Tuesday, August 5, 2014

Pirate Party

My grandson will be four years old at the end of this month and my daughter is planning a pirate party for him. He loves Jake and the Neverland Pirates, so of course I had to put pirates on his card. He is such a sweet little guy and still loves to sit on Grandma's lap. I treasure that time with him, because I know it won't be long before he will be too old for all that gushy stuff. Now for my creation:

 Closed


 Open


Recipe:

Base: white cardstock

Designer Paper: Authentique Paper stack by AuthentiquePaper.com

Jake and the Pirates: printed on my computer

Sentiments: Happy Birthday - Impression Obsession Die
                    "Swashbucklin" good time" printed on my computer

Embellishment: SU red twine


The "Happy Birthday" die cut and the striped designer paper looks blue, but both are really black. Off to work on more challenges and craft show projects.
Thanks for stopping by and have a wonderful day.

Terri

Thursday, July 31, 2014

Easel Post-It-Note Holder with Pen

Today I want to share the post-it-note holders I have been working on. These are based on the one I found here So easy to create with one sheet of cardstock and one sheet of designer paper. Wouldn't these make a wonderful gift? It's hard to tell from the picture, but I actually used two different colors of cardstock. One for the base card and one for the frame around the designer paper. A small piece of designer paper was used to wrap around the ink well inside the pen.


Recipe:

Cardstock: SU So Safron, Marigold Morning, Artichoke and Green Galore.

Designer Paper: DCWV

Flowers: Off white burlap flower on Yellow card
               Prima flowers on Green card

Pens: RSVP from Staples


The sentiments were found on Pinterest. The one on the yellow card says "The happiness of your life depends upon the quality of your thoughts" and the one on the green card says "One small positive thought in the morning can change your whole day."

 So keep positive thoughts and have a great day.

Terri 


Monday, July 28, 2014

Babies, Babies and More Babies

It seems like every time I turn around a family member or friend's family just had a baby or found out they are expecting. My friend, Judy and her husband will be first time grandparents between Thanksgiving and Christmas. They already know it's a girl, so I made this card for them.


Recipe:

Cardstock: SU Pink Passion, Close to My Heart Lilac Mist

Designer Paper: Paper Boutique Baby Girl Paper Pack

Ink: SU Pink Passion, Memento Tuxedo Black

Dies: Nestibilities Scalloped Square, SU Itty Bitty Banners framelits

Punches: SU 1 3/8" and 1 1/4" square punches

Stamps: Duck from SU "Something for Baby" stamp set
              Congratulations from "Itty Bitty Banners" stamp set

Embellishments: Pink Heart Button tied with Close to My Heart Pink Blush Waxed Thread


 I used velcro dots to close the card and I have to add the sentiment inside.

I cased this card from one I found on Pinterest. It is called the Fancy Flap Fold and can be found here.

Tomorrow my husband and I plan to take a day trip. We are hoping to take our younger daughter and granddaugher to the zoo and art museum in Cleveland,Ohio.

Have a great day everyone and thanks for stopping by.

Terri 


Wednesday, July 23, 2014

Die Cuts/ Punches

Today's challenge at the Sisterhood of Crafters is to create a project using dies and/or punches. My middle granddaughter will be 2 on July 29th, so I made her a birthday card using some of her favorite characters from Sesame Street.


Recipe:

Cardstock: Core'dinations Pastels (card base)
                   Red, green, blue, orange and black

Embellishments: wiggle eyes, orange grosgrain ribbon

Punches: 1 3/4" scalloped circle, 1 3/8" circle, photo corner punch

Die: Memory Box "Happy Birthday"


Such an easy way to create cute cards for kids. I'm sure my granddaughter will love it.

Don't forget to stop by the Sisterhood and join in on this fabulous challenge. While there, be sure and check out the "Sistahs" beautfiful creations.
  
Have a wonderful day! Thanks for visiting.

Terri